Hi,
This post is not directly related to HAM (radioamateur) hobby, but as this camera is very important tool for me and there was not so much instructions how to replace the screen correctly I thought I will share my own experiences.
I accidentaly broke my LCD while using excessive force when trying to unscrew my filter in top of my zeiko 12-20mm lens. So yeah, got thumb in wrong place and the LCD broke and died.
After that I started to google which is cheapest way to fix / replace the screen. Price tag on local Olympus store / dealer for the part and fix would be easily over 200euro so that was not an option.
Again Ebay was an friend and for about 70eur (including shipping/handling) I ordered new LCD screen from Hong Kong (link below).
Also as being cautious about the happening I inspected what would protect the LCD better in the future and ordered hard screen on top of the LCD (link below).
Here is the tools used:
– screen wipe (to remove any stains and stuff from the screen when changing it)
– 28 part phone/small electronics toolkit for the screen and screws
– new LCD screen
– hard screen protector

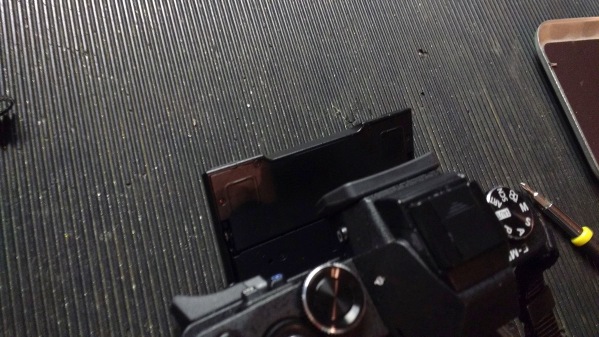
On this picture you can clearly see that the LCD screen is badly damaged

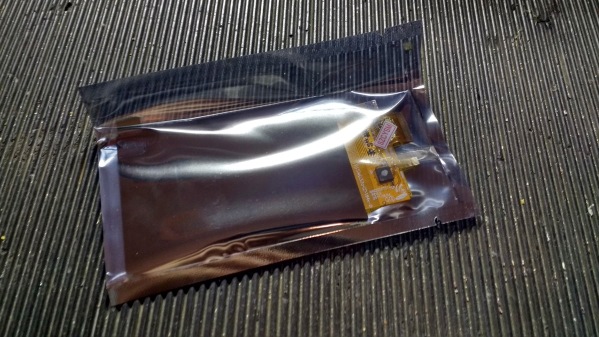
Here is the new replacement part!

Start the disassembly first by removing tree (3) screws and spaces from bottom of the lcd frame. Keep the screws and spaces in good safeplace or you will loose those tiny ones!

After that remove four (4) screws from the top of the LCD frame.

Now you should be able to carefullu pull apart the plastic bottom cover from the frame. Please note there is wire connected!

This is how it looks from the other side. Remove wire cables (just lift the locks carefully up and remove cable).

Wires removed. Remove the center unit and put it on same way on top of the another LCD unit. I used electrician tape between the center unit and the LCD frame as the tape in picture was not in good shape after peeling it apart. Rewire those two cables back to unit (position it first correctly). There is no pictures about the new unit and its rewiring but it should look exactly the same as the original one (without the tapes).

Now comes the hard part: Push old LCD screen out from the plastic frame. Only way todo this is to push is outside from the frame. Inspect the LCD screen and you see it only goes to one direction. There is 2-way adhesive tape keeping it glued to the frame. Try to preserve it as you need it later if you dont want to put new tapes in the same spot. After the tape has been removed put the new LCD screen back to its place by using the 2-way adhesive screen. Carefully put the main wire cable back to unit (dont forget the plastic bottom cover) and power up the camera. If you have cables tightened and cable locks on you should be able to see picture and use the touchscreen.

After youve inspected everything works correctly you can vise versa put the screws on (dont tight too much) and then youre done!

It works again!

I also applied hard lcd protector which should keep the screen a bit safer. That I doubt but extra protection is a plus.

Installation of protector is easy, just peel of inside tape, clean the lcd screen from dust & stuff. Put it into its place. Carefully push it to the screen and remove the top (outside) part of the tape too.

Links for Ebay:
LCD Screen: http://www.ebay.co.uk/itm/171500807939?_trksid=p2060353.m2749.l2649&ssPageName=STRK%3AMEBIDX%3AIT
LCD Screen protector: http://www.ebay.co.uk/itm/230903781053?_trksid=p2060353.m2749.l2649&ssPageName=STRK%3AMEBIDX%3AIT
Update: If you happen to damage adhesive tape in the frame you should replace it completely. It just wont hold the new LCD screen in its place.
I am looking for good 2 side adhesive tapes which could be used with this certain model.
Update2: I managed to tape it back to frame by heating the frame and carefully pushing lcd into it. With girlfriends hairdryer 🙂
very interesting post, thanks!
I have the same problem with my EM-5. But my camera also acts very strange. It sometimes doesn’t turn of or the EVF does not even work properly.
Did you experience the same problem? or was your camera working perfectly fine, except for the broken LCD?
Greetings from Norway
Hi Piet, my EM5 works just ok now when LCD was fixed. Id did not suffer effects you explain on your unit. Is that newer/older unit?
Hi, thanks for the fast response!
It’s a fairly old unit, I think. I bought it used in Japan in November 2012.
Please read below post for a detailed explanation.
https://www.mu-43.com/threads/help-needed-with-om-d-em-5-cracked-screen-camera-acting-strange.82621/
I truly appreciate your help! Thanks!
yup read it 🙂 like last poster said on mu-43 try to disable lcd touch option as it may now think its active and cause it function unproperly.
Excellent stuff, many thanks.
Great post! How was the quality of the replacement screen? Was is olympus OEM or 3rd party screen? Just wondering because there are a few OEM screens on eBay but are much more expensive than the ones coming from China. If you didn’t motive any degraded quality I’ll get the one you got.
Thanks!
It was 3rd party (china) screen. But works well! I have not noticed any degraded quality (touchscreen etc) works as it should.
I did install screen protector afterwards as it seems that this part of camera is the most vulnerable part 🙂
The replacement screen I received was exactly the same as the original, same Samsung part. It might depend on who you order from, but I ordered from the link in the article.
tnx for info! I did not pay attention for the maker of the lens.
I destroyed the adhesive tape – the outer glass was utterly shattered and I wouldn’t have removed all the fragments.
Any idea where I can get a replacement or an alternative? I’m tempted to superglue it on the inside.
I also had problems with the original tape, thought with gf’s hairdryer I was able to “glue” it in place.
Wouldnt any strong two side tape do the trick, like 3M (scotch) ? look for transparent tape ment for glueing stuff in bathroom.
I found this specialist tape – http://amzn.to/2bZOFzo – 1mm double sided, with tools, meant for fixing phone screens. I didn’t measure the old tape before I threw it away (didn’t want broken glass lying around) but I think it’s about right. I’ll update next week with how I got on… I suspect I won’t be able to do the corners well enough for the camera to be weather-sealed but it’ll be good enough to use.
Okay, thanks for info! 🙂 Happy (picture) hunting!
The tape arrived, it’s definitely 1mm and I did a neat job with the supplied tools. It’s slightly thicker than the original, so the screen isn’t flush now but it looks like it will hold very well.
Unfortunately, the small circuit board won’t connect to the short ribbon cable from the camera – it looks like the cable lock just won’t latch. It doesn’t look broken, but maybe I wasn’t careful enough when removing it. Any suggestions? Did you have to do anything to make it lock in place?
I have the same problem. Latch will not stay down on connector.
Please show picture of the latch. I did not have todo any special tricks to keep it locked.
First which comes in my mind is that the cable is not pushed all way in.
Good directions but needs more detail.
1. The screw behind the LCD screen is longer and tougher to get out. It requires a little pressure while trying to unscrew it.
2. After you open the back, there is a plastic cover over the LCD piece. Just use a flat head screw drive to lift that off.
3. The 3 connection points have a little clip. It’s facing toward the wire connection. I had a difficult time finding it.
4. You can remove the chip behind the LCD by using a screw driver, it is taped down with double sided tape. (I made the mistake of trying to remove the black tape itself)
5. You have to remove the two little black tape connected to the screw holes from the back of the screen before removing the LCD from the frame.
6. Be careful when you push out the LCD from the frame, my bottom piece of the frame broke at the screw hole areas.
7. You will most likely not be able to save the tape on the frame. I suggest getting double sided tape and cutting a couple of small pieces.
Hope this helps the next person.
Thanks for creating this guide. I bought the screen from the same eBay seller. It was a little challenging to seat the connectors correctly, so I wasn’t sure if it was actually going to work. The double sided tape was a little tricky to reuse. Good enough for now!
Good instructions, thanks! My old one was shattered (fell on it) so the tape went bad, and the plastic frame was partly broken as well so I ended up super gluing.